building on piers
Largest Art Project Ever for Uncle Rob
To bring something into existence that springs from the font of your own imagination and is realized as a result of your own physical and mental effort is satisfying to a high degree.
Evie and I moved to Mendocino in August of 1994. The house and grounds of our new home needed a lot of attention and for the next three years we went at it hammer and tong. As a result of our efforts we were on the local garden tour in 1998. After that our work load slowed down quite a bit and I began thinking about a new project to keep me occupied in my retirement.
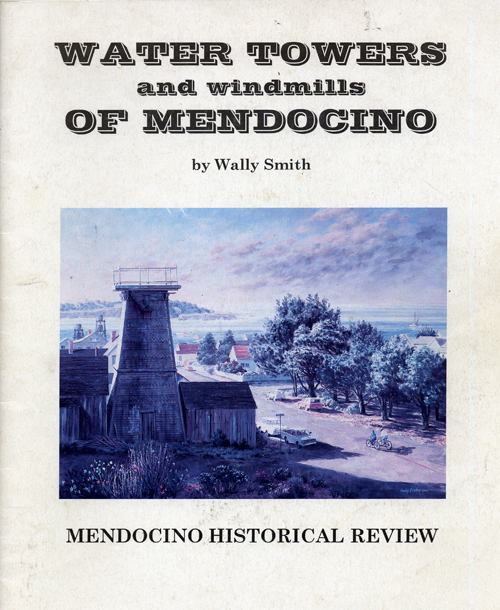
If you have ever been to Mendocino, California you will remember that one of its unique features is the assortment of water towers visible in town. They are left over from the days when all water was pumped from wells by windmills and stored in elevated tanks for gravity feed. Some are now derelict, some have been been converted into living spaces, and some are still functioning as originally intended. They give the town a distinctly quaint and historic aspect. In fact, the whole town has been designated a historic district. After studying these towers for a time I decided that I would build one for our property. I walked around town and took notes on the various construction methods, and I bought a book entitled: Water Towers and Windmills of Mendocino by Wally Smith which included a detailed description and pictorial of how they were built (see below).
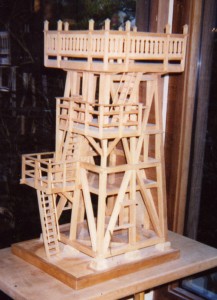
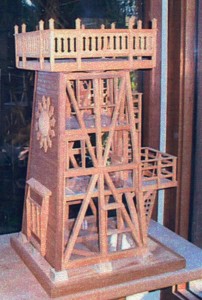
The long summer evenings of 1999 found me busy in my shop building the scale model shown below. The model, which is one inch to one foot, enabled me to work out many of the details before I actually started on the real thing.
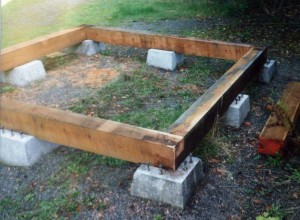
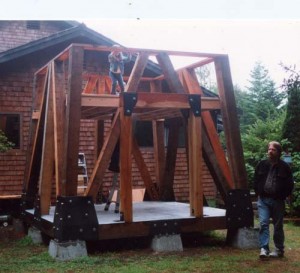
The winter of 1999/2000 had a long spell of pleasant weather right around the turn of the year and I took advantage of that to get the foundation started. The foundation consists of eight large piers each weighing about half a ton. I built a reusable form and cast them in place. Next, I connected them all with a 10″ x 10″ sill milled from our own redwood trees (see photos below). This established a base dimension of 12′ x 12′.
(click on images for larger view)
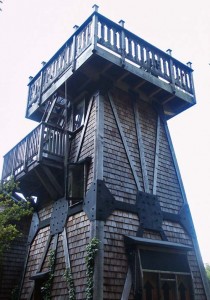
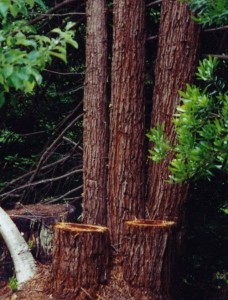
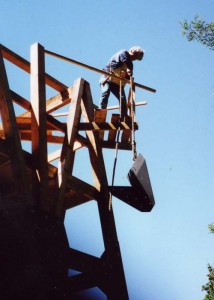
After that the fun really began. About half the timbers were milled from redwoods that grew on the property and the other half were either purchased or were gifts from Bill and Karen, Evie’s oldest son and his wife. They were very generous throughout the project. The whole structure was built in the traditional way and even though I never intended it to actually hold a water tank, I have no doubt that it could. We envisioned it mainly as an observation platform with living spaces below the top deck.
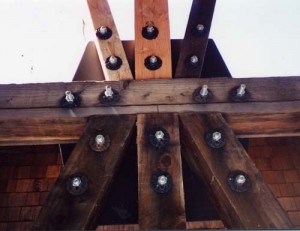
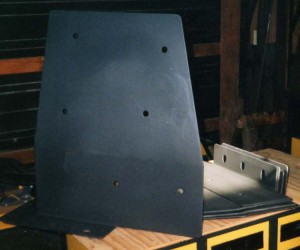
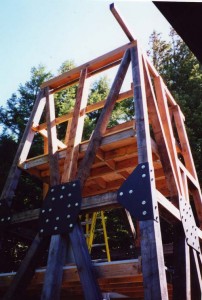
The timbers are all connected at their intersections by 1/4″ steel gussets. Each timber has two 3/4″ or 5/8″ through bolts at its ends that are fastened through the gussets.
The gussets were, at first, a puzzle. I bought the steel and was able to cut them out and drill the holes but I couldn’t bend them where required. My equipment just didn’t have that kind of capability. Eventually, I found a boat builder in Fort Bragg who had the means to do the job, and after that I just took him a cardboard template and he would knock out the whole thing. Since we live quite near the coast all the gussets were double coated with an epoxy paint. Having the walls slope in at 1 in 10 or about 6 degrees definitely complicates construction. I had to measure that angle so often that I eventually modified a standard framing square to reflect the slope.
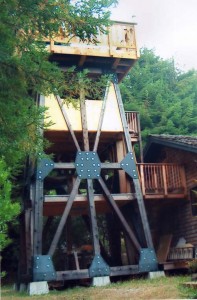
This being a retirement project where time did not equal money, I worked on it at a leisurely pace. This also helped spread the cost of materials out to an affordable pace. The following photos cover progress over the next several years and by 2003 the basic framework was complete.
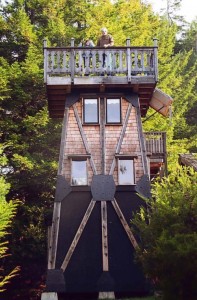
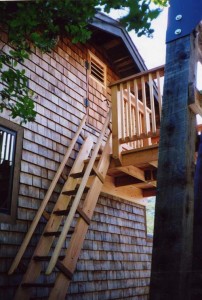
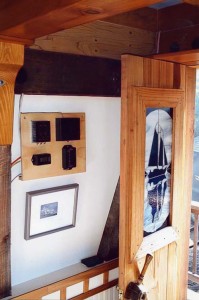
After that it was attention to details such as ladders, doors, windows, walls and floors. Originally, as shown on the model, I had planned to cover the whole structure with a siding of some kind, but by the time the basic framework was completed I was so pleased with its appearance that I resolved let it show allowing people to see that this was the genuine article and not just a look-alike.
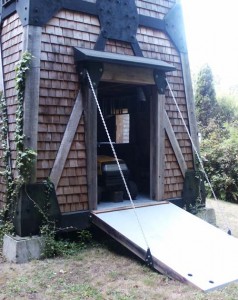
The ground floor of the finished tower is used for garden equipment storage (lawn mower, etc.). The second floor is a small spare bedroom, and the third floor is Uncle Rob’s study from which this post originates. The top deck is (so far) just for observation, but Uncle Rob has some ideas slowly cooking on the back burner of his mind. To see a video featuring this tower click here and scroll down to the video.
Categories
- THE GALLERY
- Uncle Rob's Art
- 3D Works (stills) I
- 3D Works (stills) II
- 3D Works (stills) III
- 3D Works (video)
- Design & Abstract I
- Design & Abstract II
- Design & Abstract III
- Figurative Works I
- Figurative Works II
- Landscapes I
- Landscapes II
- Largest Art Project
- Nautical and Marine Images (video)
- Nautical and Marine Images I
- Nautical and Marine Images II
- Nautical and Marine Images III
- Nautical and Marine Images IV
- Portraits
- Still Life Images
- Stump Hollow Photo Essay I
- Stump Hollow Photo Essay II
- Uncle Rob's Mendocino Shop
- The Five Sense Series
- Irene's Creations
- Works by Don Mason
- Works by Don Mason II
- Works by Joseph de Borde
- Painting by Albert Robbins
- Art by Leslie Masters Villani
- Paintings by Nellie Harriet Parker
- The Art of Bee Yearian
- Works by Evie Wilson
- Uncle Rob's Art
- SCHOONER MOON BOOKS
- SEA STORIES
- ONE DOZEN AND TWO ESSAYS
- Cousinhood
- Art by Definition
- Cake Mixed Economy
- Marriage Anyone?
- Sex and/or Violence
- Searching for Truth
- The Philosophical Roots of Science
- Stepping Stones and Stumbling Blocks
- On Being Good
- Teaching By Example
- The Basic Law of Civilization
- Where Goeth Evil?
- A Modern Empircal "Religion"
- Knowledge as Wealth
- PAPERS AND ARTICLES
- FAMILY STORIES
- BOOK REVIEWS
Archive
- December 2021
- October 2020
- June 2020
- September 2019
- July 2017
- March 2017
- December 2016
- November 2016
- October 2016
- August 2016
- July 2016
- June 2016
- May 2016
- March 2016
- February 2016
- February 2015
- January 2015
- February 2014
- December 2013
- November 2013
- August 2013
- June 2013
- August 2012
- July 2012
- April 2012
- March 2012
- February 2012
- November 2011
- September 2011
- June 2011
- May 2011
- April 2011
- March 2011
- February 2011
- January 2011
- December 2010
- November 2010
- October 2010
- September 2010
- August 2010
- July 2010
- June 2010
- May 2010
- April 2010
- March 2010
- February 2010
- January 2010
- December 2009
- November 2009
- October 2009
- September 2009
- August 2009
- July 2009
- June 2009
- May 2009
- April 2009
- March 2009
- February 2009
- January 2009
- December 2008
- November 2008
- October 2008
- September 2008
